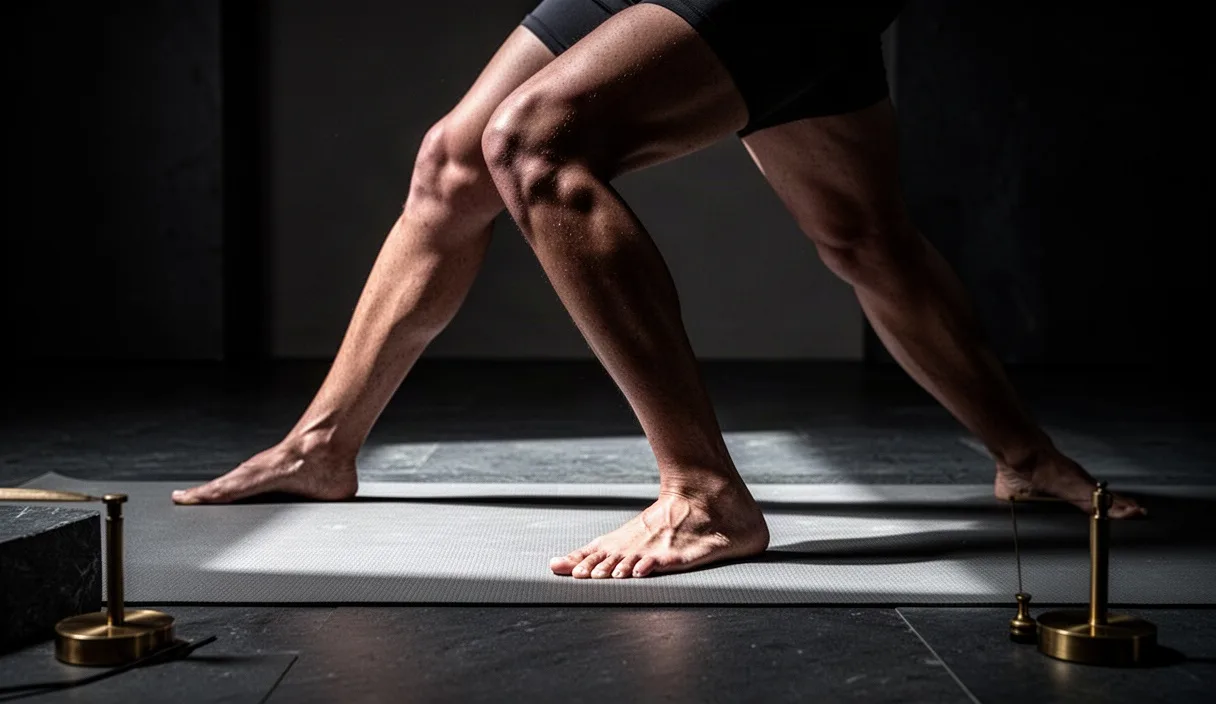

Front knees cave inward when hip stabilizers fail to counter gravity during deep lunges. In Warrior II (Virabhadrasana II), this collapse happens silently while practitioners focus on stretching their arms or sinking their hips toward the mat. When the front knee drifts medial to the second toe, shear forces transfer directly into the patellofemoral joint and the medial collateral ligament. Correcting this pattern requires understanding the mechanics of your pelvis, your gluteus medius, and the kinetic chain running down to your back foot.
Alignment in standing postures is dynamic work, not a static snapshot. A stable knee position protects cartilage, trains multi-planar hip strength, and ensures that joints carry load in their intended axes. If you experience persistent joint pain, swelling, or joint instability in your knee, consult a physical therapist or orthopedist before attempting load-bearing adjustments. Use the anatomical adjustments below to audit your stance and correct mechanical failure points before they become chronic mobility issues.
The inward valgus collapse mechanism in deep lunges
Dynamic knee valgus occurs when the femur adducts and internally rotates while the tibia remains anchored to the floor or pronates outward. In a 90-degree lunge like Warrior II, gravity exerts a downward force on your center of mass. If the muscles responsible for hip abduction and external rotation yield under this load, the knee joint falls toward the midline of the body. This tracking error shifts the patella off its femoral groove, creating uneven contact pressure across the retro-patellar cartilage surface.
This collapse creates acute mechanical stress along the medial compartment of the knee while compressing the lateral joint line. The medial collateral ligament (MCL) experiences excessive tension, while the anterior cruciate ligament (ACL) absorbs elevated torsional strain. When repeated across hundreds of vinyasa classes, this faulty tracking erodes joint structures and can cause conditions such as patellofemoral pain syndrome, pes anserine bursitis, and meniscal irritation.
| Anatomical Marker | Functional Alignment | Valgus Collapse |
|---|---|---|
| Patella Direction | Centered over the second and third toes | Points inward toward the big toe or floor |
| Femur Position | Neutral or external rotation, aligned with pelvis | Internally rotated and adducted toward midline |
| Front Foot Arch | Medial longitudinal arch lifted and active | Collapsed flat, excessive pronation |
| Medial Joint Space | Uniform joint clearance, balanced load | Widened under high tensile ligament strain |
| Lateral Joint Space | Uniform joint clearance, balanced load | Compressed with elevated cartilage friction |
The collapse rarely originates in the knee itself. The knee is a hinge joint caught between the hip and the ankle, two complex joints with three degrees of freedom. If the hip lacks rotational strength or the ankle lacks dorsiflexion mobility, the knee takes the rotational hit. Identifying valgus is simple: look down from your torso. If the patella tracks inside the line of the front big toe, your mechanical chain has broken down.
Gluteus medius cue: pull front outer hip back
The gluteus medius acts as the primary lateral stabilizer of the pelvis and a critical abductor of the hip. In the front leg of Warrior II, the posterior fibers of the gluteus medius, supported by the gluteus minimus and deep external rotators (such as the piriformis, gemelli, and obturator internus), must contract to prevent the femur from rotating inward. When these muscles go slack, the femur yields to the adduction torque created by body weight.
To engage these stabilizers effectively, use the cue: pull the front outer hip back and pin it down toward the inner rear heel. This action resists the tendency of the front hip to swing forward and outward, which pulls the knee inward. Think of drawing the head of your thigh bone (femur) deeply into its acetabulum (hip socket). This mechanical suction activates the lateral hip musculature, forcing the distal end of the femur outward and aligning the knee directly over the middle toes.
- Establish the front foot foundation: Press the base of your front big toe firmly into the rubber of your mat to maintain medial foot contact.
- Isolate the outer hip: Place your thumb into the crease of your front hip and wrap your fingers around the lateral glute pocket behind your hip bone.
- Retract the hip head: Draw the outer hip crease straight back toward the rear wall, away from your front shin.
- Confirm glute contraction: Feel the muscle tissue firm up beneath your fingers as your knee tracks outward toward the pinky-toe side of your foot.
Monitor your front big toe mound while doing this. A common compensation is lifting the inner edge of the front foot off the floor to force the knee outward, substituting ankle supination for hip external rotation. Keep the front big toe mound planted with 12 to 15 pounds of downward pressure while using the gluteus medius to pull the knee into alignment. This counter-spiral creates true joint stability.
Back foot anchor: pressing into pinky edge
The rear leg is not a passive kickstand; it dictates pelvic orientation and front-leg tracking. When the back foot goes limp, the back arch collapses, the rear femur rotates internally, and the pelvis tips anteriorly. This forward pelvic rotation shortens the distance between the hips and the front knee, forcing the front femur into internal rotation. Securing the back foot stops this chain reaction at its source.
Anchor the back foot by pressing firmly into the outer blade of the heel and the fifth metatarsal head. Turn the back foot inward roughly 15 to 25 degrees rather than setting it parallel to the short edge of the mat. This slight internal angle aligns the rear femur correctly within the hip socket, allowing you to contract the rear quadriceps and lift the rear medial longitudinal arch off the floor without straining the rear knee joint.
- Outer heel drive: Drive the outer edge of your rear heel into the mat to fire the peroneus longus and brevis muscles along the lateral calf.
- Posterior arch lift: Lift the inner arch of the back foot by drawing the inner ankle bone upward toward the ceiling.
- Rear quad engagement: Pull the back kneecap up using the vastus lateralis and rectus femoris to prevent hyperextension.
- Abductor stabilization: Use the active rear leg to anchor the rear side of your pelvis, giving the front hip a fixed base to pull against.
If the rear inner arch collapses, your pelvis rotates toward the long edge of the mat, twisting the front hip joint out of alignment. Treat the back leg as an anchor: drive down into the rear outer heel with roughly 40 percent of your total stance weight. This creates a diagonal tension line from the back heel through the pelvic rim, locking the hips into a framework that supports the front knee position.
Torso upright balance versus forward lean trap
Leaning the torso forward over the front thigh is a common shortcut for practitioners chasing stance depth. When tight hip flexors (specifically the psoas major and rectus femoris) in the rear leg limit pelvic opening, the torso tips forward at a 30 to 45 degree angle. This shift moves your center of mass directly over the front knee, increasing patellofemoral shear forces and overworking the quadriceps while unloading the hip stabilizers.
Torso position directly alters the moment arm acting on the front knee. An upright torso stacks your shoulders directly over your pelvis, distributing load between both legs and recruiting the posterior chain. Leaning forward shifts the load onto the front patellar tendon and encourages the front femur to track inward under the uncontrolled vertical load.
| Parameter | Vertical Spine Alignment | Forward Lean Compensation |
|---|---|---|
| Center of Mass | Equidistant between front and back feet | Shifted 6 to 10 inches forward over front knee |
| Front Patellofemoral Load | Evenly distributed, reduced joint shear | Significantly increased quad tendon tension |
| Pelvic Position | Neutral tilt, level along transverse plane | Anterior tilt with asymmetric hip hike |
| Gluteus Medius Action | Optimal length-tension for active abduction | Shortened, inefficient, prone to failure |
To fix this, stack your ribcage directly above your pelvic basin. Place one hand on your sternum and the other on your sacrum. Draw your front lower ribs down toward your hip points to engage the rectus abdominis and transverse abdominis. Slide your shoulder blades down your back ribs, and press both feet down to lift your spine straight up. If keeping the torso upright causes pinching in the front of your back hip, shorten your stance length by 2 to 4 inches rather than leaning forward.
Wall touch check to monitor knee drift
Visual alignment checks are often inaccurate due to perspective distortion from standing upright. Tactile biofeedback removes this guesswork. Setting up your front knee against a wall provides an immediate signal the moment the knee loses alignment or collapses inward. Use this drill during warm-ups or alignment workshops to build neuromuscular awareness of hip external rotation.
- Set the stance at the wall: Stand with the pinky-toe side of your front foot running parallel to a baseboard, positioned roughly 1 to 2 inches away from the surface.
- Align the back foot: Step your rear foot back into your normal Warrior II stance length (typically 3.5 to 4.5 feet depending on your height), angling the toes slightly inward.
- Lower into the lunge: Bend your front knee until the thigh is parallel to the floor, tracking the kneecap directly forward.
- Establish contact: Allow the outer head of the front knee (lateral epicondyle) to lightly graze the wall surface. Do not lean your body weight into the wall.
- Execute static holds: Hold the posture for 30 to 45 seconds. Maintain steady, feather-light skin contact against the wall.
If your outer hip fatigues, the front knee will pull away from the wall toward the center of your mat. That gap is your visual and tactile signal that the gluteus medius has released. When this happens, do not yank the knee back using ankle pronation. Instead, drive down through the front heel, fire the outer hip pocket, and press the outer knee back into light contact with the wall. Perform 3 sets of 5 repetitions with 5-second isometric holds at full depth to lock in this motor pattern.
Common mistakes
- Forcing pelvic squareness to the long mat edge: Human hips are rarely built to achieve complete 180-degree abduction in an asymmetrical stance. Forcing both hip points perfectly parallel to the long edge of your mat twists the front femoral head, dragging the front knee inward into severe valgus. Allow the pelvis to angle slightly toward your front foot, roughly 10 to 15 degrees off the long edge.
- Over-widening the stance width: Placing the front and back feet along a single balance-beam line demands extreme hip mobility. If your hips are tight, stagger your feet: align your front heel with the rear arch, or widen the stance by moving the front foot 2 inches toward the outer edge of the mat to give the femoral heads room to rotate cleanly.
- Collapsing the front medial arch: Allowing the inner front foot to flatten removes the foundation of the lower leg. The tibia internally rotates with the foot, pulling the knee into valgus collapse regardless of hip engagement. Press the tripod points of the foot down: the base of the big toe, the base of the little toe, and the center of the heel.
- Neglecting front shin angle: Letting the front knee shoot past the front ankle creates high shear forces in the joint capsule. Keep the front shin perpendicular to the floor at an 85 to 90 degree angle. If your knee drifts forward past your front toes, widen your stance.
Practical next steps
Incorporate the wall touch drill into your practice three times per week. Before entering Warrior II in dynamic flows, warm up the lateral hip complex with sidelying clamshells, standing lateral leg raises, or mini-band lateral walks for 2 sets of 15 repetitions on each side. Awakening the gluteus medius and deep external rotators prior to standing postures significantly reduces knee valgus during dynamic lunges.
Audit your stance in a mirror or using video recording once a month. Film yourself from a direct front angle to evaluate whether your patella tracks over the center of your foot as you move from Straight-leg Triangle into Warrior II. If you feel sharp pain inside the knee joint capsule, joint locking, or localized heat, step out of the posture and consult a licensed physical therapist or sports medicine physician for a clinical assessment.